ToDoMVC with AbsurdJS
You've probably heard about ToDoMVC project. It's same ToDo application made with different frameworks. It's interesting how the same problem is solved by different programmers following different concepts. This article is about making the ToDoMVC application with AbsurdJS.
The final result could be seen here https://github.com/krasimir/absurd/todomvc/.
AbsurdJS introduction
AbsurdJS started as CSS preprocessor, and I distributed it as Node.js module. In the process of development was transformed to HTML preprocessor and very sooner after that was translated for client side usage. At the moment is roughly 80K and could convert JavaScript to CSS and HTML.
The client-side version of AbsurdJS, the one that we are going to use, covers most of the modern frameworks' capabilities.
- Component driven
- Data binding
- DOM event handling
- Dependency injection
- Template engine
- Build-in router, Ajax wrapper and DOM helper
However, there is something fundamentally different. The framework can convert JavaScript (or JSON) to valid CSS and HTML. Moreover, when we talk about client-side development, we know that we have to write a lot of CSS and HTML. AbsurdJS gives us the power to write in one language - JavaScript. As we will see in the next sections, we will write everything into JavaScript files. Including the CSS styling.
Project's setup
The rules apply for everyone. The idea of ToDoMVC project is that every developer starts with same assets. There are template and CSS that we have to use. Our project looks like that:
/absurd
/bower_components
    /todomvc-common
/css
    /app.css
/js
    /model
        /model.js
    /views
        /footer.js
        /header.js
        /main.js
    /app.js
/index.html
absurd directory contains absurd.min.js file that is the library itself and absurd.organic.min.js which is collection of CSS mixins. bower_components folder delivers the default look of the application. The basic CSS styling and images that we mentioned above. The app.css file is the place where we have to add our custom stylesheets. However, we are going to use JavaScript for the styling so in the end the file will be almost empty. js directory contains our logic. The development with AbsurdJS is close to the development with Backbone. Thew View plays the role of the controller. We could make another comparison and say that the framework is similar to Facebook's React. Everything in AbsurdJS is a component.
Here is the skeleton of our ToDoMVC app:
<!doctype html>
<html lang=”en”>
    <head>
        <meta charset=”utf-8”>
        <title>Template • TodoMVC</title>
        <link rel=”stylesheet” href=”bower_components/todomvc-common/base.css”>
        <link rel=”stylesheet” href=”css/app.css”>
    </head>
    <body>
        <script src=”absurd/absurd.organic.min.js”></script>
        <script src=”absurd/absurd.min.js”></script>
        <script src=”js/app.js”></script>
        <script src=”js/model/model.js”></script>
        <script src=”js/views/header.js”></script>
        <script src=”js/views/main.js”></script>
        <script src=”js/views/footer.js”></script>
    </body>
</html>
We included the CSS styles at the top of the page and the scripts at the bottom.
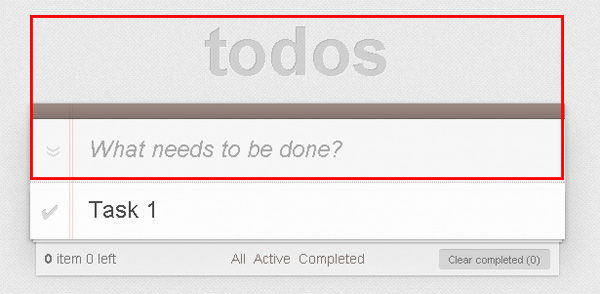
The header
Our HTML starts with a simple header
<header id=”header”>
    <h1>todos</h1>
    <input id=”new-todo” placeholder=”What needs to be done?” autofocus>
</header>
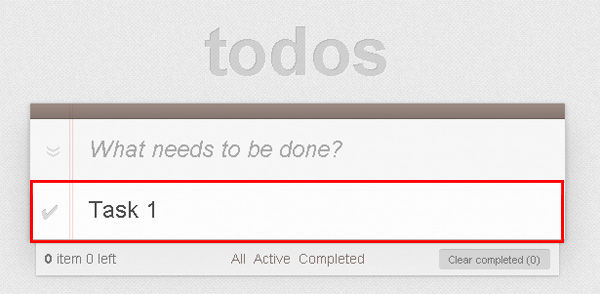
The main area
Just after that we have an area that contains the list with the ToDos.
<section id=”main”>
    <input id=”toggle-all” type=”checkbox”>
    <label for=”toggle-all”>Mark all as complete</label>
    <ul id=”todo-list”>
        <li>
            <div class=”view”>
                <input class=”toggle” type=”checkbox”>
                <label>Task 1</label>
                <button class=”destroy”></button>
            </div>
            <input class=”edit” value=”“>
        </li>
    </ul>
</section>
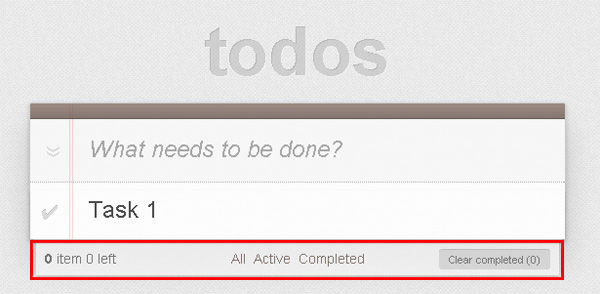
Footer
In the end, we have a footer. It contain some informational spots and filtering navigation.
<footer id=”footer”>
    <span id=”todo-count”>
        <strong>0</strong> item 0 left
    </span>
    <ul id=”filters”>
        <li><a class=”” href=”#/”>All</a></li>
        <li><a class=”” href=”#/active”>Active</a></li>
        <li><a class=”” href=”#/completed”>Completed</a></li>
    </ul>
    <button id=”clear-completed”>Clear completed (0)</button>
</footer>
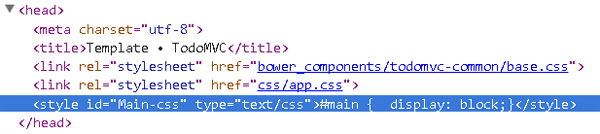
The CSS styles
There is only one thing that we will do in css/app.css file. We will hide the footer and the main section. It is not because we cannot do that in JavaScript. It is because the JavaScript needs time to boot, and the user may see something before that. So:
#footer, #main {
  display: none;
}
Defining a namespace
It is good practice to work in a private namespace. If we expose everything to the global scope, we may have collisions with other frameworks or libraries. Here is how our js/app.js starts:
(function( window ) {
    'use strict';

    window.absurd = Absurd(); // AbsurdJS API
    window.App = {}; // namespace

})( window );
use strict puts your code in strict mode. John Resig posted a nice article revealing more information about that. In general:
- It catches some common coding bloopers, throwing exceptions.
- It prevents, or throws errors, when relatively “unsafe” actions are taken (such as gaining access to the global object).
- It disables features that are confusing or poorly thought out.
It is a good way to write a little bit better code.
When we include AbsurdJS in the page, we have access to global Absurd function that returns the API of the library. We store that in window.absurd. All the other code that we write should be under window.App namespace.
AbsurdJS components and its dependency injection
Before to proceed with the actual implementation, we should say few words about AbsurdJS components and the integrated dependency injection. The typical component looks like that:
var ComponentClass = absurd.component('Name', {
    constructor: function() {
        // …
    },
    doSomething: function() {
        this.dispatch('some-event', { data: 42 });
    }
});

var component = ComponentClass();
component.on('some-event', function(event) {
    console.log('The answer is ' + event.data);
}).doSomething();
The component API returns a function. We could call this function and create as many instances of the component as we need. The syntax is similar to the one used in Backbone.js. We send our logic as an object. The entry point of the component is the constructor method. By default, every instance is an event dispatcher. In the example above, we are subscribing to some-event. Just after that we fire doSomething function that internally dispatches the event.
Sooner or later we start thinking about managing dependencies. The different parts of our application need different modules, and it is good if there is any elegant way to deliver them. AbsurdJS implements the AngularJS's dependency injection. Here is how it works:
absurd.di.register('mymodule', {
    doSomething: function() {
        console.log('Hi!');
    }
});

absurd.component('Name', {
    doSomething: function(mymodule) {
        mymodule.doSomething();
    }
})().doSomething();
We first register our dependency via the absurd.di.register function. It could be anything, function, object or maybe a string. After that, we just type our module as a parameter. The framework automatically calls the function with the right arguments. The very important thing is to keep the same name used in the register method.
Writing the model
In the typical MVC pattern, the model is a class that stores and manages our data.We will stick to this idea and will write our model in that manner.
We will store the ToDos of our application in the local storage of the browser. So, it makes sense to have a wrapper around this functionality. We will define it as a dependency so we have access to it easily later.
// js/app.js
absurd.di.register('storage', {
    key: 'todos-absurdjs',
    put: function(todos) {
        window.localStorage.setItem(this.key, JSON.stringify(todos));
    },
    get: function() {
        if(window.localStorage) {
            var value = window.localStorage.getItem(this.key);
            return value != null ? JSON.parse(value) : [];
        }
        return [];
    }
});
We have just two methods - put and get. They deal with the window.localStorage. The first one accepts the array containing the ToDos and the second one returns it.
Now let's use it as dependency and start filling our model with functions:
// js/model/model.js
App.Model = absurd.component('Model', {
    data: [],
    constructor: function(storage) {
        this.data = storage.get();
    },
    updated: function(storage) {
        storage.put(this.data);
    },
    add: function(text) {
        this.data.push({
            title: text,
            completed: false
        });
        this.dispatch('updated');
    }
});
Once our model is initialized we try to get the data from the storage. Notice that we are injecting the storage object. data is a property of our class that holds the ToDos. There is also add method. We send the text of the ToDo, and the component makes a new entry. Moreover, the same method dispatches updated event. In AbsurdJS, the component could catch its own events. All we have to do is to define a function with the same name.
We will modify the data array in various situations. There are parts of our user interface that are interested in these changes. These parts should be notified and Dispatching updated event guarantee that. At the same time, the model itself needs to update the content of the local storage. So, we could simply add an updated method. It will be called once the event with the same name is dispatched.
By definition, the ToDoMVC app needs to do few other operations. Like, for example, toggling, removing or editing. It should also show some information about how many ToDos are completed or left. Here is the list of methods that cover these functionalities:
toggle: function(index, completed) {
    this.data[index].completed = completed;
    this.dispatch('updated');
},
changeTitle: function(title, index) {
    if(title === '') {
        this.remove(index);
    } else {
        this.data[index].title = title;
    }
    this.dispatch('updated');
},
toggleAll: function(completed) {
    for(var i=0; i<this.data.length; i++) {
        this.data[i].completed = completed;
    }
    this.dispatch('updated');
},
remove: function(index) {
    this.data[index] ? this.data.splice(index, 1) : null;
    this.dispatch('updated');
},
all: function() {
    return this.data.length;
},
left: function() {
    return this.todos('active').length;
},
completed: function() {
    return this.todos('completed').length;
},
areAllCompleted: function() {
    return this.todos('completed').length == this.todos().length;
},
todo: function(index) {
    return this.data[index];
},
todos: function(filter) {
    var arr = [];
    switch(filter) {
        case 'active':
            for(var i=0; i<this.data.length; i++) {
                if(!this.data[i].completed) arr.push(this.data[i])
            }
        break;
        case 'completed':
            for(var i=0; i<this.data.length; i++) {
                if(this.data[i].completed) arr.push(this.data[i])
            }
        break;
        default: arr = this.data;
    }
    return arr;

},
clearCompleted: function() {
    this.data = this.todos('active');
    this.dispatch('updated');
}
We have methods that give us access to the items stored in the data array. In some cases, we need the ToDo presented as a JavaScript object. So, defining methods like todo save us time. Also, we need to filter the records. todos function accepts a filter setting and makes the cut.
Bootstrapping the application
In programming, we always have an entry point. In our case this point will be in the js/app.js file. Let's create a component that acts as arbiter. It will create instances from the model, header, main and footer classes.
// js/app.js
absurd.component('Application', {
    ready: function() {
        var model = App.Model();
    }
})();
We define a new component class called Application and immediately create an instance from it. We write code that lives in the browser so, in most of the cases we are interested running it once the page is fully loaded. Every AbsurdJS component could have ready method. It is, of course, optional but if it is set the framework calls it when the DOM is ready.
We have only the model defined, so we initialize it. The model variable will be sent to the other parts of the application.
Adding new ToDo
The HTML markup that is responsible for adding a new ToDo is positioned in the header.
<header id=”header”>
    <h1>todos</h1>
    <input id=”new-todo” placeholder=”What needs to be done?” autofocus>
</header>
AbsurdJS works with dynamically created DOM elements. Moreover, supports fetching elements from the current DOM tree. In this article, we are not going to use templates defined in the JavaScript. More information about that is listed here. We will work with the markup that is already in the page.
Here is the finished version of our Header class:
// js/views/header.js
App.Header = absurd.component('Header', {
    html: '#header',
    onInputChanged: function(e) {
        if(e.keyCode == 13 && e.target.value.toString().trim() != '') {
            this.model.add(e.target.value.trim());
            e.target.value = '';
        }
    },
    constructor: function(model) {
        this.model = model;
        this.populate();
    }
});
Let's examine it piece-by-piece:
html: '#header'tells to AbsurdJS that this component work with an element matching#headerselector.- The constructor of the component accepts the model and calls the internal function
populate. It is the only magical function in the framework. It does several things like fetching the right DOM element, parsing it as a template, compiling CSS and adding events' listeners. After the calling of this method, we have access tothis.elproperty that points to the actual DOM element. - onInputChanged - this is an event handler that has to be attached to the input field. It checks if the user presses the
Enterkey. If yes it calls theaddmethod of the model and clears the field.
The Header class looks ok. However, it does not do anything right now because there is no event attached. To make the things work, we do not have to update our JavaScript. We need to set data-absurd-event attribute in the HTML:
<header id=”header”>
    <h1>todos</h1>
    <input
        id=”new-todo”
        placeholder=”What needs to be done?”
        data-absurd-event=”keyup:onInputChanged”
        autofocus>
</header>
And of course we have to create an instance from the class in app.js:
// js/app.js
var model = App.Model(),
    header = App.Header(model);
Displaying the ToDos
Let's say that we have data in our storage. We need to show the ToDos on the screen. Let's start filling js/views/main.js file:
// js/views/main.js
App.Main = absurd.component('Main', {
    html: '#main',
    filter: 'all',
    todos: [],
    constructor: function(model) {
        this.model = model;
        this.todos = this.model.todos(this.filter);
        this.populate();
    }
});
Still the same pattern. We define the component and set the value to the html property. The model is passed to the constructor. We fetched the current ToDos and call the populate method. The app.js file needs one more line:
var model = App.Model(),
    header = App.Header(model),
    main = App.Main(model);
So far so good. If we open the application now, we will see no results. It is because we did not update our template. In other words, if we want to show something we have to add expressions. By expressions, I mean code that means something to the framework. The current template is as follows:
<section id=”main”>
    <input id=”toggle-all” type=”checkbox”>
    <label for=”toggle-all”>Mark all as complete</label>
    <ul id=”todo-list”>
        <li>
            <div class=”view”>
                <input class=”toggle” type=”checkbox”>
                <label>Task 1</label>
                <button class=”destroy”></button>
            </div>
            <input class=”edit” value=”“>
        </li>
    </ul>
</section>
And we will change it to:
<section id=”main”>
    <input id=”toggle-all” type=”checkbox”>
    <label for=”toggle-all”>Mark all as complete</label>
    <ul id=”todo-list”>
        <% for(var i=0; todo = todos[i]; i++) { %>
        <li>
            <div class=”view”>
                <input class=”toggle” type=”checkbox”>
                <label>Task 1</label>
                <button class=”destroy”></button>
            </div>
            <input class=”edit” value=”“>
        </li>
        <% } %>
    </ul>
</section>
We wrapped the <li> tag in a for loop. There are two things that we have to mention here:
- There is no new language or syntax between
<%and%>. The expressions are pure JavaScript - The expressions are evaluated in the context of the component. So we have access to every property or method of that component. In our case, we are using the
todosproperty.
Now let's add some ToDos and check what is going on:
We do not have logic that updates the UI when a new ToDo is added, so we have to refresh the page. What we see is that there are two new <li> tags added, but they are not visible. And they are not visible because we set display: none to the #main container. We did:
// css/app.css
#footer, #main {
    display: none;
}
We need to change that. Here is the moment where AbsurdJS become handy. Normally when we are in such situation we:
- create a new CSS class like
.main-visiblethat hasdisplay: blockin it - set the style manually to the element
With AbsurdJS is a bit different. At the beginning of the article, we said that this is a library that started as CSS preprocessor. It converts JavaScript to CSS. In the client-side context, this could be used for CSS injection. Let's change our class so it shows the container if there are any ToDos:
// js/views/main.js
App.Main = absurd.component('Main', {
    html: '#main',
    filter: 'all',
    todos: [],
    css: {
        '#main': {
            display: '<% model.all() == 0 ? “none” : “block” %>'
        }
    },
    constructor: function(model) {
        this.model = model;
        this.todos = this.model.todos(this.filter);
        this.populate();
    }
});
We are able to use expressions in the CSS too. model.all() returns the number of the ToDos in the list. All we have to do is to call this.populate() and the framework will grab the content of the css property, will convert it to valid CSS and will inject it into the page.
We need to subscribe to the updated event of the model so we can update the interface when the model changes. It makes sense to create a separate function:
// js/views/main.js
App.Main = absurd.component('Main', {
    html: '#main',
    filter: 'all',
    todos: [],
    css: {
        '#main': {
            display: '<% model.all() == 0 ? “none” : “block” %>'
        }
    },
    constructor: function(model, router) {
        this.model = model;
        model.on('updated', this.bind(this.update));
        this.update();
    },
    update: function(filter) {
        this.filter = filter || this.filter;
        this.todos = this.model.todos(this.filter);
        this.populate();
    }
});
After this change, we are able to see the newly added entries. However, the label of the ToDo in the browser is still Task 1. So:
<label>Task 1</label>
should be changed to:
<% todo.title %>
Here is the result so far:
Removing, editing and toggling ToDos
Our code can add new ToDos. We will continue with the rest of the tasks - removing, editing and toggling.
Deleting an entry
We have a button reserved for the purpose. Its markup is as follows:
<button class=”destroy”></button>
And we will change it to:
<button class=”destroy” data-absurd-event=”click:removeToDo:<% i %>”></button>
Similar like in the previous section, we added an event listener. However, this time we are doing something more. We make our function accepts an argument, and this is the current index of the ToDo. Here is how removeToDo looks like:
// js/views/main.js
removeToDo: function(e, index) {
    this.model.remove(index);
}
Notice that the event handler receives firstly the usual event object. Our custom parameter is sent as a second argument. The model does the rest of the task. The UI is automatically updated because we are subscribed to the model's updated` event.
Toggling the ToDos
The guys from ToDoMVC said that we had to add completed class to every item that we mark as done. AbsurdJS compares its virtual DOM to the one in the actual tree and makes the necessary changes. So, all we have to do is to add one conditional statement that checks the completed flag of the ToDo:
<li class=”<% todo.completed ? 'completed' : '' %>”>
This is enough to update the list. Every time when we call populate AbsurdJS updates its virtual DOM element and if the class property is updated will transfer that change to the page. Here is the new method for toggling:
// js/views/main.js
toggleToDo: function(e, index) {
    this.model.toggle(index, e.target.checked);
}
We have to update the HTML, so we call toggleToDo when the user clicks on the checkbox.
<input class=”toggle” type=”checkbox”>
Became:
<input class=”toggle” type=”checkbox” data-absurd-event=”click:toggleToDo:<% i %>”>
The result looks like that:
We could add one more function that will toggle all the entries:
toggleAll: function(e) {
    this.model.toggleAll(e.target.checked);
}
And attach it to the element with #toggle-all id:
<input id=”toggle-all” type=”checkbox” data-absurd-event=”click:toggleAll”>
Editing
The editing happens when the user double clicks on an item in the list. The data-absurd-event attribute should be set to the <</li> tag:
<li
    class=”<% todo.completed ? 'completed' : '' %>”
    data-absurd-event=”dblclick:edit:<% i %>”
>
We need to make one more modification. There is an input field that we will show. In that field, the user will type the new value. At the moment we have:
<input class=”edit” value=”“>
And we change it to:
<input
    class=”edit”
    value=””
    data-absurd-event=”keyup:onInputChanged:<% i %>, blur:save:<% i %>”
>
Notice that we are calling onInputChanged along with another function save. AbsurdJS accepts multiple event handlers separated by commas. We may add as many as we want. For that particular element, we need to catch the Enter and Esc keys. So we save or discard the changes. When the user leaves the field we should perform saving too. This is the reason behind the blur event listening.
Here is the logic behind onInputChanged and save:
onInputChanged: function(e, index) {
    if(e.keyCode == 13) {
        this.save(e, index);
    } else if(e.keyCode == 27) {
        e.target.value = this.currentTitle;
        this.save(e, index);
    }
},
save: function(e, index) {
    this.model.changeTitle(e.target.value.trim(), index);
}
Improving UI after the population
Imagine that we mark all the ToDos as done with the #toggle-all button. The button itself has a small icon that is changed into different color. This is all nice but we should make sure that we return the initial color if some of the ToDos is unchecked. We will use the populated function:
populated: function() {
    var checkboxes = this.qsa('.toggle');
    for(var i=0; i<checkboxes.length; i++) {
        checkboxes[i].checked = this.todos[i].completed;
    }
    this.qs('#toggle-all').checked = this.model.areAllCompleted();
}
That function is called when populate method finishes its job. Notice that in this example we are using this.qs and this.qsa that are just shortcuts to document.querySelector and document.querySelectorAll. What we are doing above is just checking if the current entries are all selected. If not then we update the checked property of the toggle button.
The footer
The footer shows information about the currently selected ToDos and performs filtering. It also has a button for clearing the completed records. We again need some additions to the HTML:
<footer id=”footer”>
    <span id=”todo-count”>
        <strong><% this.model.left() %></strong>
        item<% this.model.left() == 1 ? '' : 's' %> left
    </span>
    <ul id=”filters”>
        <li>
            <a class=”<% this.filterIndex === 0 ? 'selected' : '' %>” href=”#/”>All</a>
        </li>
        <li>
            <a class=”<% this.filterIndex === 1 ? 'selected' : '' %>” href=”#/active”>Active</a>
        </li>
        <li>
            <a class=”<% this.filterIndex === 2 ? 'selected' : '' %>” href=”#/completed”>Completed</a>
        </li>
    </ul>
    <% if(this.model.completed() > 0) { %>
    <button id=”clear-completed” data-absurd-event=”click:clearCompleted”>Clear completed (<% this.model.completed() %>)</button>
    <% } %>
</footer>
At top of the snippet, we show how the left ToDos. The unordered list contains three links that show all the entries, only the active ones and only the completed ones. In the end, we conditionally show the button that removes the finished ToDos.
Here is the code that we have to place in js/views/footer.js:
App.Footer = absurd.component('Footer', {
    html: '#footer',
    filterIndex: 0,
    css: {
        '#footer': {
            display: '<% model.all() == 0 ? “none” : “block” %>'
        }
    },
    constructor: function(model) {
        this.model = model;
        this.model.on('updated', this.bind(this.update));
        this.update();
    },
    update: function(filterIndex) {
        this.filterIndex = typeof filterIndex != 'undefined' ? filterIndex : this.filterIndex;
        this.populate();
    },
    clearCompleted: function() {
        this.model.clearCompleted();
    }
});
It looks a lot like js/views/main.js in the beginning. We again have CSS injection that depends on model.all(). The model is passed to the component, and we subscribe to its updated event. The clearCompleted method simply forwards the task to the model. We should also add one more line to js/app.js so we get our footer class initialized:
footer = App.Footer(model);
Now if we refresh the page we see that everything works perfectly except the filtering. We got #/active and completed in the bar, but nothing happens. It is because we do not have any logic that handles these changes in the URL.
AbsurdJS has build-in router that works with the good old hash type of navigation but also supports the History API. Let's change the ready function of js/app.js to the following:
ready: function(router) {
    var model = App.Model(),
        header = App.Header(model),
        main = App.Main(model),
        footer = App.Footer(model);

    router
    .add(/active\\/?$/, function() {
        main.update('active');
        footer.update(1);
    })
    .add(/completed\\/?$/, function() {
        main.update('completed');
        footer.update(2);
    })
    .add(function() {
        main.update('all');
        footer.update(0);
    })
    .listen(10) // listening for route changes
    .check();
}
Because the router is part of AbsurdJS, it is also available for dependency injection. We simply drop it as an argument. The class accepts regular expressions and compare them to the current URL. If some matches calls a function. There are methods listen that fires the check method every ten milliseconds.
Summary
AbsurdJS is a client-side framework that aims to provide simplicity. It sticks to the JavaScript object literals for defining classes. It has powerful template processing, dependency, and CSS injection.
If you are interested using it check out the official site at https://github.com/krasimir/absurd/.