From PHP to Node with Zeit's lambdas and Cypress.io
The first post in this blog was published on 25th of August 2008. This place was always living on a shared PHP/MySQL hosting. It was driven by a custom made PHP CMS for over 10 years. It is time to move forward and follow my actual language of choice - JavaScript. I spent some time recently migrating it to Zeit and this article is showing my process.
- The reasons
- The plan
- Export content from the old MySQL database
- e2e testing with Cypress.io
- Migrating my content to Zeit's lambdas
- Final words
The reasons
There were couple of reasons which made me transition from PHP/MySQL to statically generated content driven by Node:
- First of all I'm not writing PHP for years. I'm mainly working with JavaScript and jumping into PHP world was a little bit boring for me. The level of laziness immediately raised up when I had to do something within my site or blog. Having JavaScript as a base made everything a lot more interesting to me.
- The usage of shared hosting has its own disadvantages. From time to time I'm seeing that my site is down (couple of times per year). Google analytics shows me low performance levels on areas that I didn't touch for years. For example one of my most popular articles dropped by ~150% in page load last week.
- The company that I'm using is a small local provider. I'm happy with them but every time when I want something slightly out of their usual customer service I hit a wall. For example I now wanted to have SSL installed and when I emailed them they didn't respond. While on the day after I sent another email with DNS question and got immediate reply. So, it is not their availability. It's just http-to-https implementation difficulties.
I'm using Zeit for two other projects (Poet and IGit) and I'm already familiar with how the things work. It is also a really good service which fits perfectly for me. The idea of serverless brings the necessary scalability and also hides tons of complications for a person like me. I like playing with stuff like nginx, docker and kubernetes but I'm not a devops guy. I just want to write JavaScript and ship stuff. Zeit is the exact abstraction that I need. I'm sure there are other similar companies but I like their attitude and fine touch on the tooling.
The plan
https://krasimirtsonev.com/blog has ~50K visitors per month. It is not much but it gives me (a) a tribune for sharing my stupid ideas and (b) ~$40 in my pocket each month. The money come from the single ad provided by Carbon. So, I definitely want to keep that running. If not else it's more then enough to cover the domains and hosting of my side projects.
The successful migration means keeping the content in terms of text and assets and also keeping the URLs to the pages so whatever was indexed is still relevant. Here is the plan:
- Export content from the old MySQL database.
- Write e2e tests so I'm sure that nothing is broken when the migration happens.
- Write a few lambdas so I serve the same content as before.
- Change the DNS of my domain to Zeit's ones.
- Run the e2e tests to prove that everything is ok.
Export content from the old MySQL database
I spent some time to search for a MySQL-to-JSON conversion tool but realized that a simple PHP function will dump everything in the exact shape that I needed. I had to refresh my mind and remember how my crappy CMS works but beside that it wasn't that difficult. 30 minutes later this popped up:
public function dump($req, $res) {
  $this->init($req, $res);
  $articles = $this->modelArticles->get()->order("position")->desc()->flush();
  header("Content-type: application/json");
  die(json_encode($articles));
}
It's of course specific to my CMS but the most important bit is at the end of the method where I convert a PHP object to JSON string and send it to the browser (I love using the die function). I then saved the result to a data.json file. JSON because I'm going to use it later in my Node serverless functions.
e2e testing with Cypress.io
The e2e tests are really important for the whole migration. And in general is good to have at least your happy paths covered by such tests. I don't have any rich user experience so my happy paths are just single pages. The tests just need to confirm the existence of those pages and their content. Here's my list:
- The home page and its content
- All my articles (I do have a list of all articles so I can generate an e2e test for each one of them)
- The RSS feed of the blog
Cypress runner
Cypress.io is on my radar for months. I knew that there are a lot of people using it and they are all happy. So, I spent some time reading the docs and dived in by installing the cypress module:
> npm install cypress --save-dev
Once installed there are two options:
- Using the Cypress test runner as an Electron app
- Using the runner as a CLI
I actually did both to see how's the overall experience. To run the app I used the following line:
> ./node_modules/.bin/cypress open
The window that I saw is as follows:
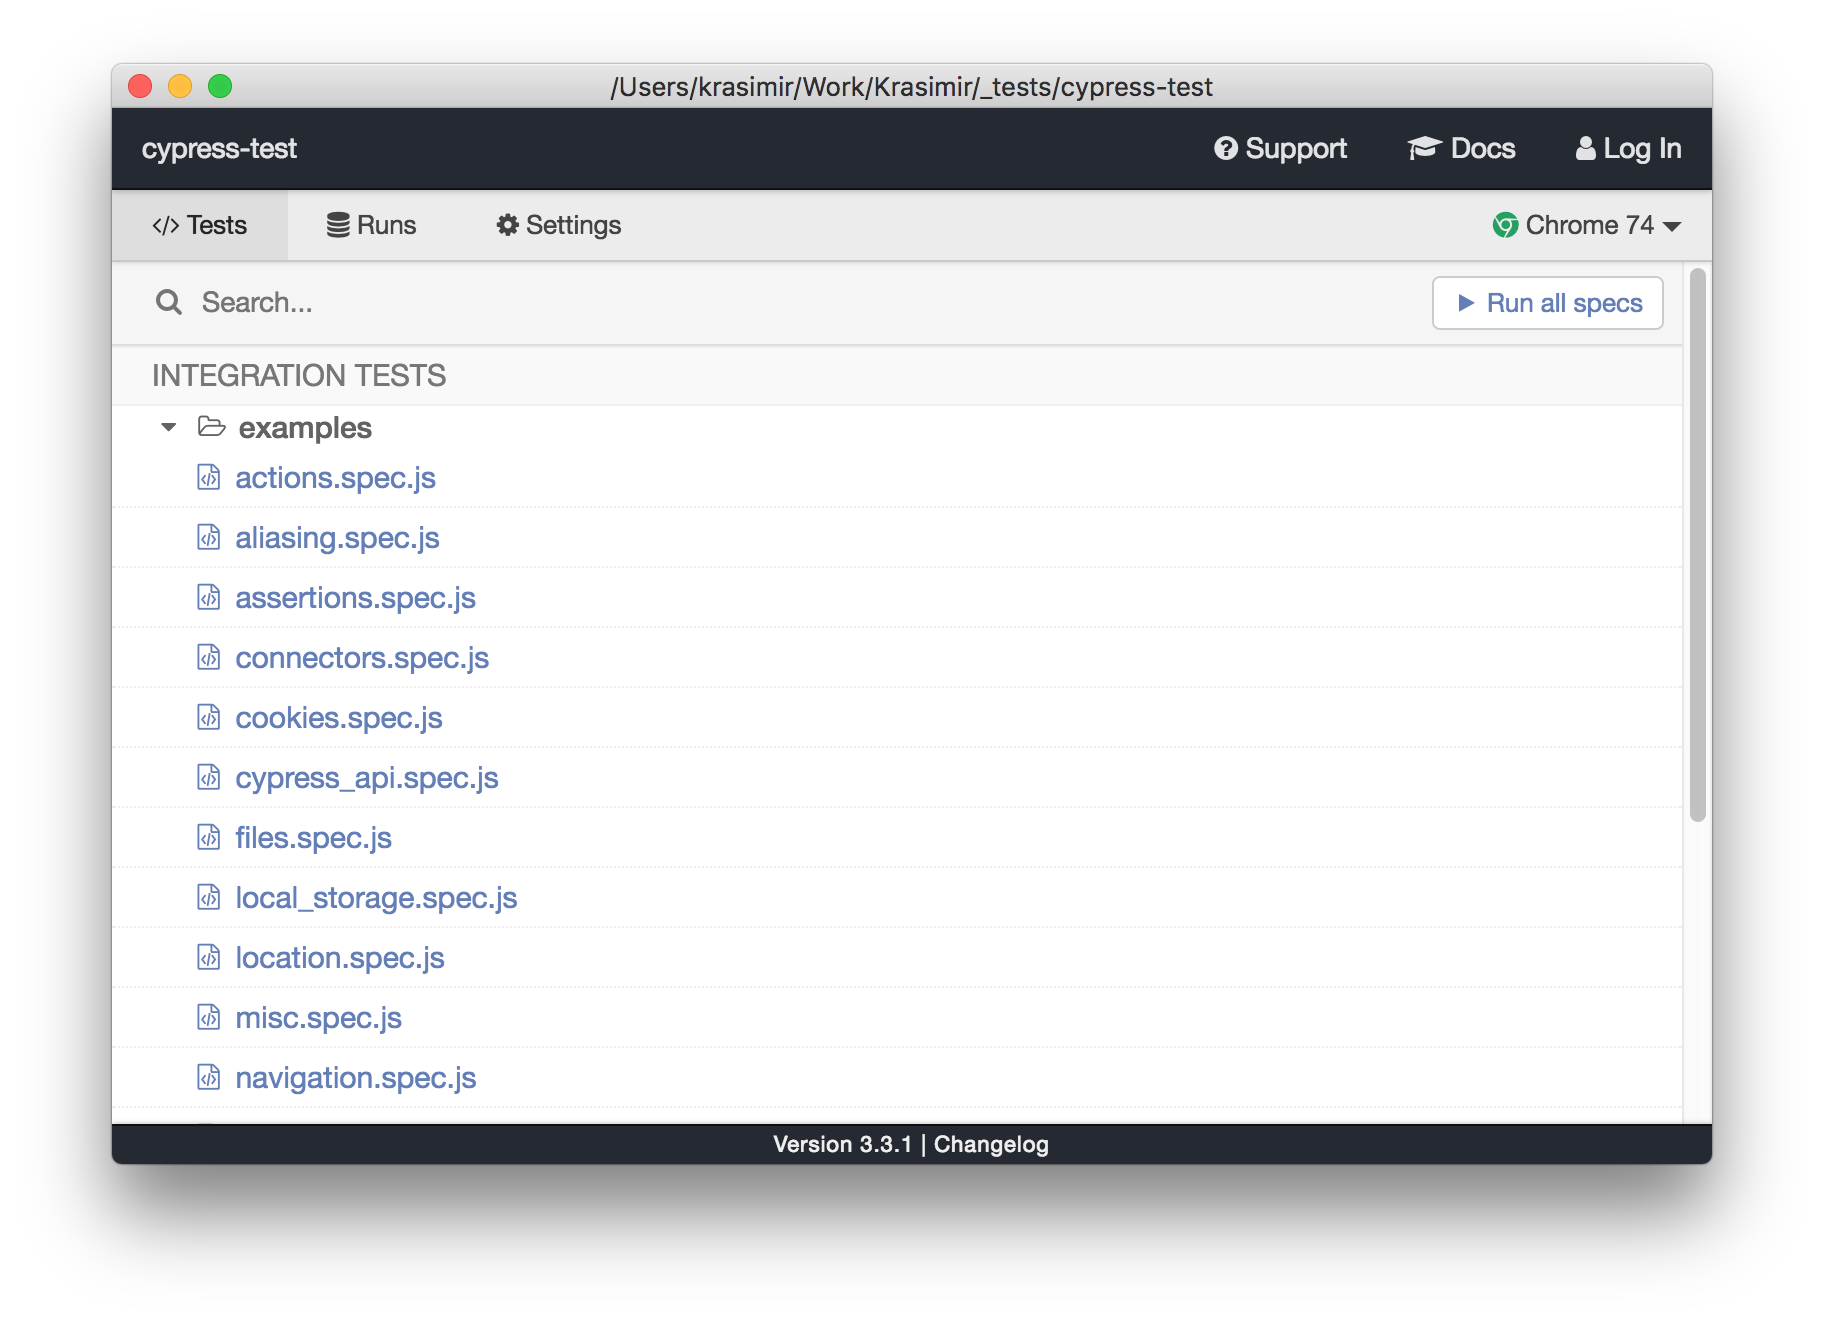
Immediately after installation Cypress comes with bunch of examples which I browsed quickly. I was however too enthusiastic and I urged to create my own test. Next to node_modules directory I got a new one called cypress. Those examples that I mentioned are actually there available as JavaScript files.
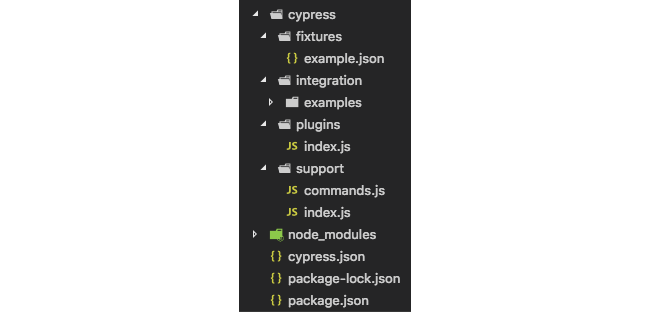
As far as I understood my tests should go under the integration folder. I cruelly deleted the examples directory and placed a brand new file called homepage.spec.js. The Cypress app is still running and immediately showed my file. I was a bit surprised to see it working so smoothly. My experience with such type of folder watching is not very good but looks like they nailed it.
Writing the tests
There are no so many things on my home page. What I wanted to verify is the existence of my name, a link to my blog and the various sections like "Writing", "Speaking", "Projects" etc. Here is the test:
describe('When visiting the home page', function() {
  it('should see my name on it', function() {
    cy.visit('https://krasimirtsonev.com');
    cy.contains('Krasimir Tsonev');
  });
  it('should have a link to my blog', function() {
    cy.visit('https://krasimirtsonev.com');
    cy.contains('my blog').should('have.attr', 'href', 'https://krasimirtsonev.com/blog');
  });
  it('should have the necessary sections', function() {
    cy.visit('https://krasimirtsonev.com');
    cy.contains('h3', 'Writing');
    cy.contains('h3', 'Speaking');
    cy.contains('h3', 'Projects');
    cy.contains('h3', 'Education and experience');
    cy.contains('h3', 'Contact');
  });
})
I started seeing why people love Cypress. Its API is so expressive and intuitive. To be honest I didn't read much of documentation on that but I was able to guess most of the methods and its params. Here is the result when I run the test:
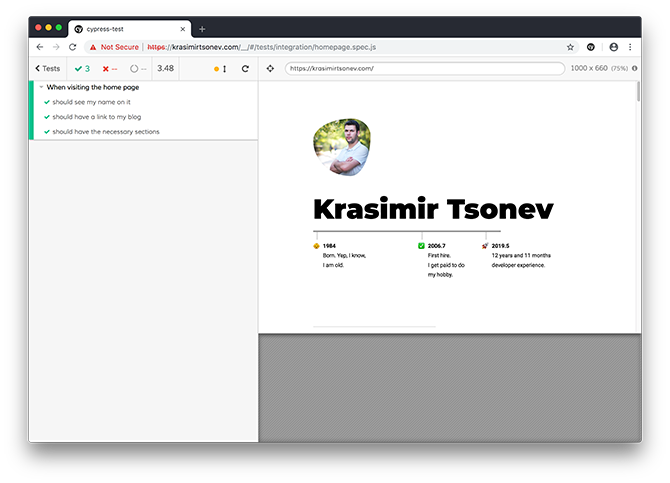
The runner visited my web site three times and it run the assertions above.
The other two tests that I have look similar. The one that verifies my blog's home page and my posts is as follows:
describe(`Given the blog's home page`, () => {
  describe('when visit the home page', () => {
    before(() => {
      cy.visit(`https://krasimirtsonev.com/blog/`);
    })
    it('should have list of articles', () => {
      cy.get('[class="article_title"]').should('have.length', 10);
    });
    it('should have the proper sidebar', () => {
      cy.contains('Subscribe to my newsletter');
      cy.get('.similar-posts li').should('have.length', 9)
    });
    it('should be able to navigate to an article', () => {
      cy.get('h2 a').eq(0).click();
      cy.url().should('include', 'https://krasimirtsonev.com/blog/article/')
    });
  });
})

describe(`Given ${ articles.length } articles`, () => {
  describe(`when we visit the article's page`, () => {
    articles.forEach(article => {
      it(`should find the ${ article.url_Text } article`, () => {
        cy.visit(`https://krasimirtsonev.com/blog/article/${ article.url_Text }`);
        cy.contains('h1', article.title_Text);
      });
    });
  });
});
articles is an array that contains all blog posts.
At the end I wanted to check if my blog's RSS is available. I know for a couple of Twitter bots that are reading it so it was important to have it migrated.
describe(`Given the blog's rss`, () => {
  describe('when open the rss', () => {
    it('should load the rss', () => {
      cy.request(`https://krasimirtsonev.com/blog/rss`).then(response => {
        expect(response).to.have.property('status', 200);
        expect(response.body).to.include('rss version="2.0"')
      })
    });
  });
})
If those tests are passing I'll basically prove that the migration is successful. The idea is to run them again once I switch the DNS entries of krasimirtsonev.com to Zeit's servers.
At the end of this section I want to mention the Cypress's dashboard. It's a place where we can see the result of our tests. What we did above is to run the tests locally in a desktop app. It is however possible to run everything in a headless fashion and see the results recorded. I set up a project and run ./node_modules/.bin/cypress run --record --key <mykey>.
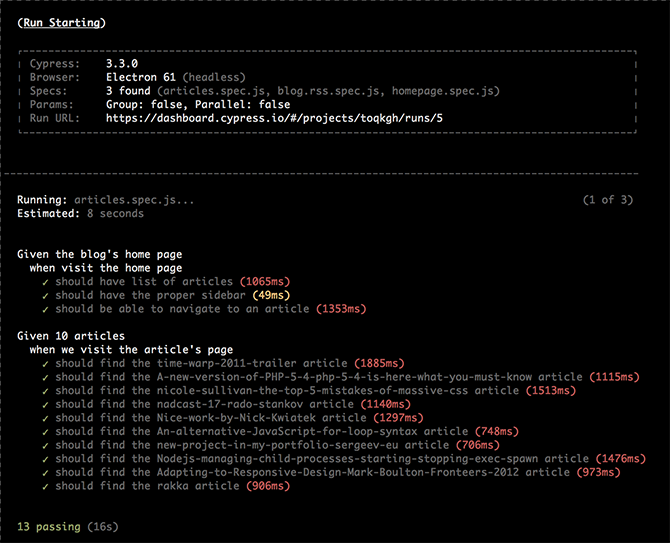
There are some neat features like screen recording of the runner and running tests in parallel. So, if you need to write e2e tests in scale do check Cypress.io.
Now, let's move with writing some serverless Node functions.
Migrating my content to Zeit's lambdas
The very first thing that I wanted to migrate is my site's home page. It's basically my resume. In the old PHP version that was a single HTML file enhanced by a little dynamic PHP snippets. Those snippets were injecting the content of my "Writing" and "Speaking" sections. I'll do the same here. I'll create a static index.html file and will use it as a template. I'll read it and will inject some data. The result will be send to the client's browser.
Writing serverless functions
To do that I'll first need something that works locally on my machine and replicates the setup on Zeit's servers. That tool is called Now. If you start using the services of this company you'll see that they fine tune each of their product and tools. Now is a CLI instrument with a minimalistic API for managing your projects. As we will see in this section we will use it for all the stages of our development - local run, deploying and domain setup. It's distributed as a npm package and could be installed via npm i -g now. Then later we can spin up a local server by just executing npm dev in our working directory. It just works out of the box. By default it acts as file browser and if we add a now.json file we are able to run JavaScript lambdas (and not only).
The main configuration of every Zeit project is in that now.json file. It contains routes definitions which we map to actual files and instruct Zeit how to process them. The processing happens via builders. There are different types of builders. So far I used only @now/static and @now/node. The first one serves your files directly as they are and the second one runs lambdas (serverless functions).
As a starter my now.json looks like this:
{
  "name": "ktcom",
  "version": 2,
  "alias": "krasimirtsonev.com",
  "builds": [
    { "src": "home/*.js", "use": "@now/node" }
  ],
  "routes": [
    { "src": "/(.*)", "dest": "/home/index.js" }
  ]
}
We have a single route that basically handles every request and points it to /home/index.js. That file is a JavaScript file that must export a function like function (req, res) { ... }. In my case it looked like this:
const fs = require('fs');
const data = require(__dirname + '/data.json');
let html = fs.readFileSync(__dirname + '/page.html').toString('utf8');

html = html.replace('{articles}', getArticles(data.articles));
html = html.replace('{talks}', getTalks(data.talks));

module.exports = (req, res) => {
  res.setHeader('Content-Type', 'text/html');
  res.end(html);
};
The most important thing here is to understand that what runs over and over again for each request is not the whole file. Or in other words the @now/node builder will not read data.json and page.html every time when someone opens https://krasimirtsonev.com. It will do this job only once. What gets executed per user request is the exported function. This makes the response really fast because there is no processing at all. The HTML of my home page is simply cached in the memory and served instantly as a text/html string.
When I run now dev the CLI tells me what builders are installed and what's the URL where I can access the local server:
> now dev
[0] > Now CLI 15.2.0 dev (beta) — https://zeit.co/feedback/dev
[0] - Installing builders: @now/node
Ready! Available at http://localhost:3000
Of course serving just HTML is not enough. I have some CSS and images to load. I copied them from the old PHP project and amended slightly my now.json to bring them in.
{
  "name": "ktcom",
  "version": 2,
  "alias": "krasimirtsonev.com",
  "builds": [
    { "src": "home/assets/**/*.*", "use": "@now/static" }
    { "src": "home/*.js", "use": "@now/node" }
  ],
  "routes": [
    { "src": "/home/assets/pics/(.*)", "dest": "/home/assets/pics/$1" },
    { "src": "/home/assets/css/(.*)", "dest": "/home/assets/css/$1" }
    { "src": "/(.*)", "dest": "/home/index.js" }
  ]
}
(I know that I can combine both pics and css handling into a single line but I prefer to be a little bit more explicit while defining routes.)
So, I had my home page and I wanted to migrate my blog. I first started by creating another lambda function that was reading the data.json and was serving each of the articles. It was something like this:
const { parse } = require("url");
const fs = require('fs');

const template = fs.readFileSync(__dirname + '/article.html').toString('utf8');
const data = require('./data.json');

module.exports = (req, res) => {
  const { query } = parse(req.url, true);
  const article = data.articles.find(({ url }) => url === query.article);
  let content = '';

  if (article) {
    content = template
      .replace('{content}', article.content)
      .replace('{date}', article.date)
      .replace('{category}', article.category);
  } else {
    content = '<h2>Article not found!</h2>';
  }

  res.setHeader('Content-Type', 'text/html');
  res.end(content);
};
It was working fine. I spent some time to create the blog's home page which was showing an intro text for the last 10 articles. The pagination and category specific pages were also done. A four beautifully ~30 loc serverless functions handle all of my content. No frameworks, no setup. Just FOUR JavaScript files. I was quite happy but then over night I realized that I can go even further.
Going static
I explored the idea of statically generated sites years ago. This approach works perfectly for places where the creation of the content and its consumption happens asynchronously. And this is valid for majority of the blogs out there. I write an article once per week and publish it and the only one thing that changes in my whole project is three files. And they change only once. So I decided to ditch the lambdas and go with a statically generated blog. Again published on same infrastructure but speeding it up by generating the content locally and letting Zeit act as a super fast CDN.
_(There is @now/static-build builder specifically made for this purpose. I however prefer to generate the content locally because I can see what exactly is changed before publishing.)
I wrote quickly a generate.js file that I run with node ./generate.js. The script goes over my articles in the data.json file and generates bunch of folders with post.html file inside. post.html contains not only the article but a complete page with header, footer, comments and sidebar.
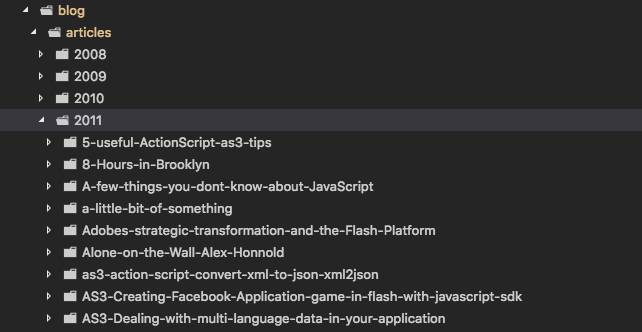
I know that there are a lot of static site generators and I could easily use one of them. However, I have a pretty minimal requirements + I already have my markup and CSS set up. My generate.js file is 180 lines long and I can easily modify it (I'm not going to publish it here but if you are interested DM me and I'll show it to you). So, I decided to be pragmatic and do hack it alone.
Deployment and alias
At the end I had everything running locally. now dev was serving my whole site - home page, blog and rss feed. I'm a bit sad that I have only one super simple lambda working but that's how it is. It's just I don't have anything complex happening and serving static content is an idea faster.
The next step is to deploy what I have on my machine. And guess what - it happens via three letters:
> now
The report that I'm getting is:
> Deploying ~/Work/Krasimir/ktcom under krasimir
> Using project ktcom
> Synced 179 files (5.1MB) [5s]
> https://ktcom-qcrbdidot.now.sh [v2] [9s]
┌ blog/public/*                  2 Ready             [2s]
├── blog/public/page48.html
├── blog/public/category-Fun.html
├── blog/public/page49.html
├── blog/public/page33.html
├── blog/public/page55.html
└── 632 output items hidden
╶ 4 builds hidden                4 Ready             [2s]
> Ready! Aliased to https://ktcom.krasimir.now.sh [in clipboard] [2m]
Notice that every deploy ends up in its own dedicated URL. In my case this is https://ktcom-qcrbdidot.now.sh. I also have an automatic alias happening https://ktcom.krasimir.now.sh. This is very useful if we want to have a staging environment. The alias in the context of Now is basically a custom domain that points to a deployment. Like in my case ktcom.krasimir.now.sh points to ktcom-qcrbdidot.now.sh. This means that I can easily create other aliases like for example krasimirtsonev.com points to ktcom-qcrbdidot.now.sh and this happens via the now alias command. There is even an easier option. I can specify my alias in my now.json and run now --target production.
{
  "name": "ktcom",
  "version": 2,
  "alias": "krasimirtsonev.com",
  "builds": [
    ...
  ],
  "routes": [
    ...
  ]
}
This will assign krasimirtsonev.com to the latest deployment.
Dealing with DNS
To make the alias working I had to add my domain via now domains add <domain> and verify it. The verification was a bit tricky for me not because of Zeit but because of my current hosting provider. They gave me an option to set only two DNS records while I needed four. I had to wait so they set them manually. Once that was done my domain was successfully verified and I was able to alias.
Final words
Once I got my new https://krasimirtsonev.com I run the Cypress tests and call it done. All this happened for two days during the weekend and I spent like six hours in total. I can't recommend highly enough Cypress and Zeit which made my migration so easy and fun. It may not look like a big thing for you but I was procrastinating this for years. Now it is done and I can finally enjoy SSL on my site + high speed delivered content driven entirely by JavaScript.