No back-end blog solution with Node.js and Markdown
Before a couple of weeks I published Techy. It's a flat CMS based on Node.js and Markdown. I made it because I wanted to write my articles in Markdown format and avoid the annoying publishing workflow which I'm using now. I feel that it's not very clear how Techy works and decided to create a simple blog illustrating the processes.
The idea
The idea is simple. We write Markdown files and by running the techy command in the terminal these files are converted to beautifully looking HTML pages. The final result of this article could be seen here. The home page of the blog looks like that:
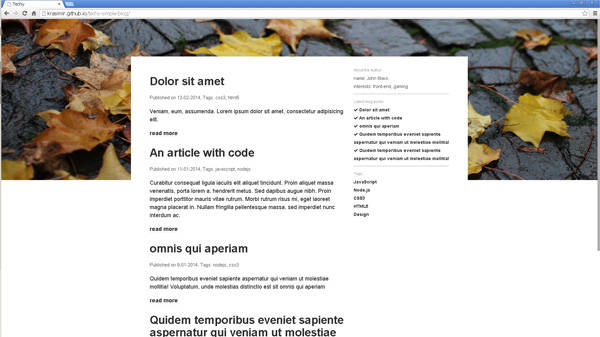
So, we have articles. These articles have title, date and tags attached. There are two types of pages.
- Page which shows a list of articles (title + preface)
- Page which shows the actual article's content
The picture above is a preview of the first type. The list of article is on the left side of the viewport. The sidebar on the right contains a short info about the author of the blog, the latest posts and shortcuts to the tags' pages.
Installing Techy
Techy is a Node.js module so we should have Node.js on our system. All we have to do after that is:
npm install -g techy
The command will setup the tool as a global command line instrument and we will be able to run the techy command.
Setup
Now, let's create a new directory blog. Let's also add the necessary files and folders:
└── blog
    └── articles
        └── A.md
        └── B.md
        └── C.md
        └── ...
    └── libs
    └── partials
    └── tags
    └── all.md
    └── index.md
The articles directory will contain the blog posts. In libs we will write two custom Techy methods, but more about that in the next sections. partials will contain the code for the footer, the sidebar and two other partials. tags folder will host pages similar to index.md except that the articles inside will be filtered by specific tag. index.md is the home page and all.md shows all the written publications. On the landing page we are going to show only the latest four blog posts and we need another page with all the data.
How Techy works
If we go to our blog directory and run techy will see that our Markdown files are converted to HTML.
└── blog
    └── articles
        └── A.html
        └── A.md
        └── B.html
        └── B.md
        └── C.html
        └── C.md
        └── ...
    └── libs
    └── partials
    └── tags
    └── themes
    └── all.html
    └── all.md
    └── index.html
    └── index.md
There is also a new folder copied - themes. It contains the main HTML layout, the CSS and the JavaScript needed for the basic look of the site. There are two themes inside. Called without any parameters Techy uses the default one. So, here is the pipeline:
- The CSS stored in themes/default/css is compiled to a file themes/default/public/styles.css
- The JavaScript stored in themes/default/js is compiled to a file themes/default/public/scripts.js (there is no JavaScript by default)
- Every Markdown file is converted to HTML
- If there are any expressions they are evaluated
- The basic layout is got from themes/default/tpl/layouts/basic.html
- There is a placeholder which is replaced with the content of the Markdown (point 3)
- A file with the same name, but ending on .html is saved in the same directory
The format of the articles
For Techy every file is actually an object and we may use methods like set create properties. For example:
# That's the title of my page
<% set('somevar', 42) %>
The answer is <% get('somevar') %>.
Techy supports Yaml Front Matter which in a few words means that we are able to define variables in the beginning of the file like that:
---
date: 11-01-2014
title: An article with code
preface: Curabitur consequat ligula iaculis elit aliquet tincidunt.
tags:
  - javascript
  - nodejs
---
Which is equivalently to this:
<% set('date', '11-01-2014') %>
<% set('title', 'An article with code') %>
<% set('preface', 'Curabitur consequat ligula iaculis elit aliquet tincidunt.') %>
<% set('tags', ['javascript', 'nodejs']) %>
Techy is a flat CMS. This means that there is no database where to store the information about the pages. And instead to use a global configuration file it keeps the data for the articles inside them. I personally like that because when we want to change something for any post we have to make changes on only one place.
The content of the files in the articles directory is too big to be published here but you can check it in the GitHub repository here. In general, every page has date, title, preface and tags. We are going to use these properties to generate the correct HTML content.
The layout
By default, there is only one column of text. However, we need two columns. So, in order to make this change we need to update the main layout of the blog located in themes/default/tpl/layouts/basic.html. Let's change the following code:
<div class="content">
   <% get('content') %>
</div>
to
<div class="content">
    <div class="row">
        <div class="col-main"><% get('content') %></div>
        <div class="col-sidebar"><% template('partials/sidebar.md') %></div>
    </div>
    <footer><% template('partials/footer.md') %></footer>
</div>
As we said above, every Markdown in Techy is an object. This object has properties and functions which could be accessed via expressions written between <%_ and _%>. In the code above we used two functions:
- get - it gets the content of already set variable. In our case, Techy internally use set('content', '...') to store the content of the Markdown file.
- template - it injects a partial. sidebar.md and footer.md still does not exists, but we will add them in the next sections.
We need to make few addition to the CSS of the site to get the two new divs floats next to each other. By default Techy uses AbsurdJS as a CSS preprocessor. There are some basic styles written in themes/default/css. We are going to change basic.js. Here is the code needed for the layout:
'.row': {
    '-wm-bxz': 'bb',
    '&:after': {
        content: '" "', d: 'b', cl: 'b'
    },
    '.col-main': {
        '-wm-bxz': 'bb', wid: '65%', fl: 'l',
    },
    '.col-sidebar': {
        '-wm-bxz': 'bb', wid: '35%', fl: 'l',
    },
    '@media all and (max-width: 600px)': {
        '& .col-main, & .col-sidebar': {
            fl: 'n', wid: '100%'
        }
    }
}
It may looks scary but once you get into AbsurdJS atoms and molecules the things make sense. It is compiled to:
.row, .row .col-main, .row .col-sidebar {
  box-sizing: border-box;
  -webkit-box-sizing: border-box;
  -moz-box-sizing: border-box;
}
.row:after {
  display: block;
  clear: both;
  content: " ";
}
.row .col-main {
  width: 65%;
}
.row .col-main, .row .col-sidebar {
  float: left;
}
.row .col-sidebar {
  width: 35%;
}
@media all and (max-width: 600px) {
  .row .col-main, .row .col-sidebar {
    float: none;
    width: 100%;
  }
}
Of course, you are not tight to AbsurdJS. You may use plain CSS, LESS or SASS. Just check out the official documentation of Techy to found the necessary steps.
While I was preparing that tutorial I made some other changes in the CSS. Like for example I updated the font sizes, added a background image at the top, styled the footer and so one. The source code for these changes could be found here.
The custom Techy methods
Before to continue with the actual content of the pages or the sidebar we will write two custom methods. The first one will get the Markdowns from the articles directory, will sort them by date and will return the content in the form of HTML.
// blog/lib/list.techy.js
module.exports = function(template, max) {
    template = template || 'partials/article-home.md';
    var articles = this.pages('articles', 'date');
    var html = '', to = max || articles.length;
    for(var i=0; i<to; i++) {
        var article = articles[i];
        html += this.template(template, {
            title: article.get('title'),
            preface: article.get('preface'),
            link: this.linkto(article), // linkto is also a build in function
            date: article.get('date'),
            tags: article.get('tags').join(', ')
        });
    }
    return html;
}
In order to create a custom method we need to add a file ending on .techy.js. It's not necessary to be in a lib folder. The file should contain the usual Node.js module which exports a function. The same function later is executed in the context of the current page. So, all the methods which we can use in the Markdown files are available here. The only one difference is that we need to call them with this. in front. The function above accepts two parameters. The first one, template, is the skeleton which we will put the content in. We are going to use list function on two places so it is good to have this changeable. The default value is partials/article-home.md. max argument defines how many articles to be included in the list. There is a build-in method pages which gives us an access to all the Markdown files in the project. We need only those which are placed inside the articles folder. They will be also sorted by the date property. The last thing that we have to mention is the usage of the template function. We already saw it in the basic layout of the theme but here accepts a second parameter. It's a hash with key-value pairs. The passed keys will be available as variables in the template which looks like that:
// blog/partials/article-home.md
---
noSave: true
layout: none
---

## <% get('title') %>

<small>Published on <% get('date') %>, Tags: <% get('tags') %></small>

<% get('preface') %>

<a href="<% get('link') %>">read more</a>
Notice that we are setting noSave: true and layout: none because this is a partial. We don't want to be saved to HTML and we don't want to be wrapped in the basic layout.
The second method will be almost the same. It will just filter the articles by tag.
// blog/lib/listbytag.techy.js
module.exports = function(tag) {
    var template = 'partials/article-home.md';
    var articles = this.pages('articles', 'date');
    var html = '', to = articles.length;
    for(var i=0; i<to; i++) {
        var article = articles[i];
        var tags = article.get('tags');
        if(tags && tags.indexOf(tag) >= 0) {
            html += this.template(template, {
                title: article.get('title'),
                preface: article.get('preface'),
                link: this.linkto(article),
                date: article.get('date'),
                tags: article.get('tags').join(', ')
            });
        }
    }
    return html;
}
We are again getting all the articles, but this time filter them manually by the passed tag.
The sidebar
Having the handy list and listbytag methods we are able to make our sidebar.
// blog/partials/sidebar.md
---
layout: none
noSave: true
---

<small>About the Author:</small><br />
name: John Black<br />
interests: front-end, gaming

---

<small>Latest blog posts:</small><br />
<% list('partials/article-sidebar.md', 5) %>

---

<small>Tags:</small><br />
<a href="<% linkto('javascript') %>">JavaScript</a>
<a href="<% linkto('nodejs') %>">Node.js</a>
<a href="<% linkto('css3') %>">CSS3</a>
<a href="<% linkto('html5') %>">HTML5</a>
<a href="<% linkto('design') %>">Design</a>
This is a partial so no saving and no layout. The rest is just calling of the functions written in the previous section. The links to the tags' pages are generated successfully by using the linkto method. It accepts a name of a page. And by page's name we mean a name property set in the page.
Tags page
The page which displays the articles having javascript as a tag looks like that:
// blog/tags/javascript.md
---
name: javascript
---
# JavaScript

<% listbytag('javascript') %>
The key moment here is the setting of the name property. That's how the sidebar gets the correct link. The pages for the other tags are absolutely identical. Only the word javascript is replaced.
The home and the all articles page
These two pages are the shortest in the whole project.
// blog/index.md
<% list(null, 4) %>

// blog/all.md
---
name: all
---
<% list() %>
The footer
The footer contains a link to the home page and a link to the page showing all the articles:
// blog/partials/footer.md
---
layout: none
noSave: true
---

<a href="<% get('paths').root %>"><i class="fa fa-home"></i> Home</a>
<a href="<% linkto('all') %>"><i class="fa fa-list-ul"></i> All articles</a>
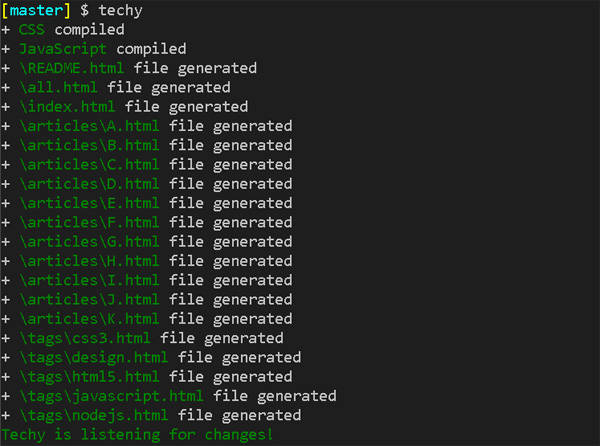
Final compilation
To compile everything we need to execute one more time techy in the blog folder. The output in the console should be:
Summary
The power of Techy is in the concept that every Markdown is an object. We are able to access it, define and retrieve properties. Having this as a base we are able to build everything and basically wire the different parts of the project without the need of back-end code. The other benefit of such approach is that we are serving only static HTML files which could increase the page load significantly.
Source code
Demo: http://krasimir.github.io/techy-simple-blog/
Source code: https://github.com/krasimir/techy-simple-blog