Compiling iOS application under Windows with Flex SDK
As you may know, Apple doesn't allow creation of iOS applications just like that. Especially under Windows. It's somehow a complex process, which requires several steps in a specific order. However it is still possible and you can do that without Mac.
Introduction
The main task is to use Flex SDK to develop an interactive iOS application. In other words - to convert .swf file to installable .ipa file. You can download the SDK from here. What you need is the AIR Developer Tool (ADT). It's located in bin directory of the sdk. I suggest you to include it in your global Path, so you can invoke the adt command everywhere (check step 1 for more information regarding the global Path). The official documentation says that we should use the following command:
adt -package -target ipa-debug -keystore iosPrivateKey.p12 -storetype pkcs12 -storepass qwerty12 -provisioning-profile ios.mobileprovision HelloWorld.ipa HelloWorld-app.xml HelloWorld.swf icons Default.png
It's a little bit difficult to read, but here are the files which we need:
- valid .p12 certificate file
- mobile provision file (.mobileprovision)
- application descriptor (.xml)
- of course, .swf file
The application description (3) could be easily created with every editor (like notepad for example). It is clear the we have the .swf file, so the big issue is finding the .p12 certificate and the mobile provision file.
Step 1: generate certificate signing request file
To generate the .p12 file we need a valid developer certificate from the Apple's system. We can get one from developer.apple.com, but before to go there we need a certificate signing request file. To create it, use SSL for windows. Download it from here. After successful installation you should be able to run the following command in your windows's prompt.
openssl -help
If you receive
'openssl' is not recognized as an internal or external command, operable program or batch file.
then you should add the openssl.exe in your PATH variable. Run the following command:
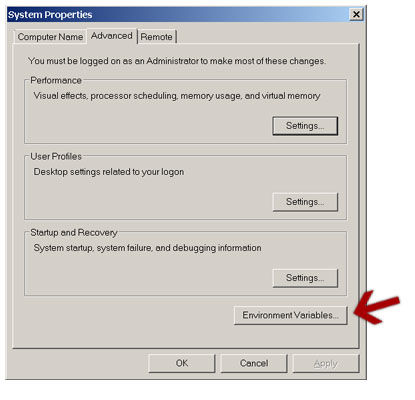
sysdm.cpl
In the opened window choose Environment Variables... button under the Advanced tab.
Find Path in System variables section, click Edit button and add the path to openssl.exe.
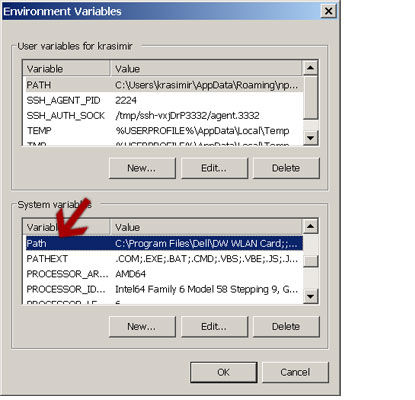
In my case this is
C:\\Program Files (x86)\\GnuWin32\\bin\\
Once you have the openssl.exe accessible from everywhere you can generate a .key file:
openssl genrsa -out developer.key 2048
Create the .certSigningRequest file:
openssl req -new -key developer.key -out CertificateSigningRequest.certSigningRequest -subj "/emailAddress=youremail@site.com, CN=Firstname Lastname, C=EN
If you receive
Unable to load config info from /usr/local/ssl/openssl.cnf
then run the following command and try again (have in mind that the path to openssl.cnf could be different on your computer)
set OPENSSL_CONF=C:\\Program Files (x86)\\GnuWin32\\share\\openssl.cnf
Step 2: generate certificate
The whole process requires a developer account in Apple's system. Unfortunately it's not free and the cost at the moment is 99$ per year. If you don't have such account you can go here and make an order.
Open https://developer.apple.com/ and click on Member Center at the header. After successful login you should see the following screen:
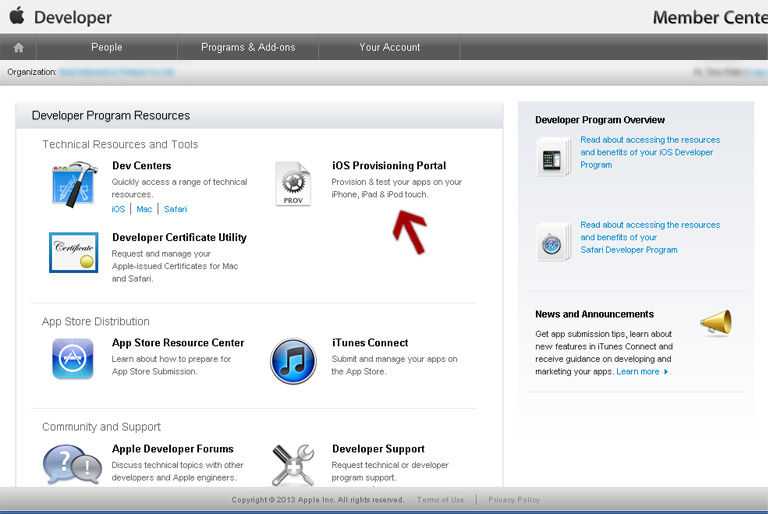
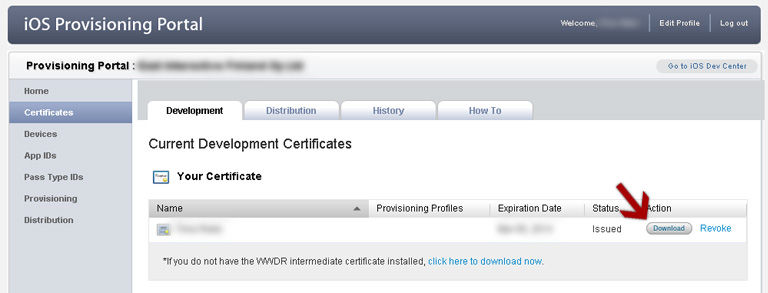
Click on iOS Provisioning Portal and after that on Certificates (it's in the left sidebar menu). In the new page choose Request Certificate.
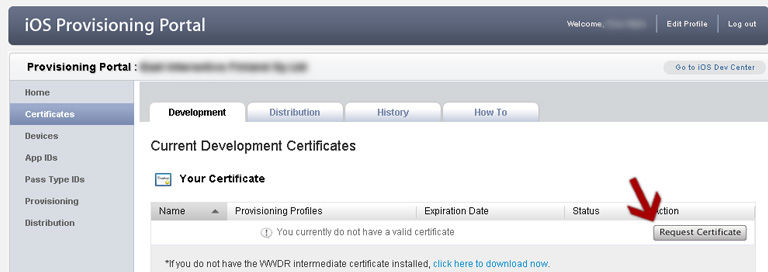
Here is the place where you should use the generated .certSigningRequest file. Choose the option 3 and attach your file.

For awhile your certificate will be flagged with status Pending Issuance. Refresh the page few times and you will be able to download it.
Step 3: register your device
It's an interesting fact that your application will not run on any device. Even if it is compiled successfully iTunes will not be able to install it if your device is not added into developer.apple.com. So, again go to https://developer.apple.com/ -> Member Center. From the right menu choose Devices and select Add Devices button.
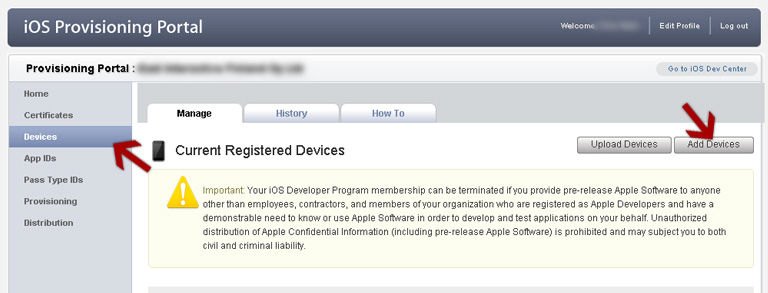
Put whatever you want in Device Name, but you should get the right Device ID.

I think that the easier way to do this is to launch iTunes and get it from there.
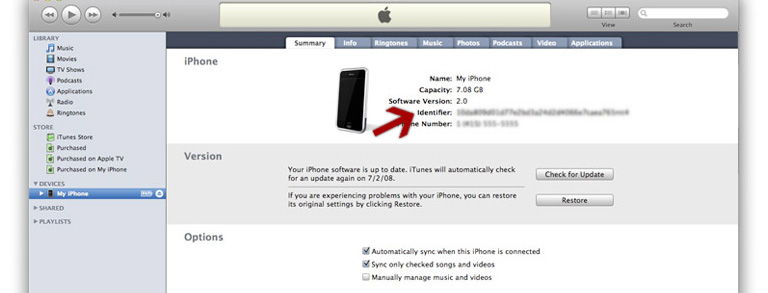
In some cases you will see Serial number instead of Identifier. Just click on it and it will change.
Step 4: create an ID for your app
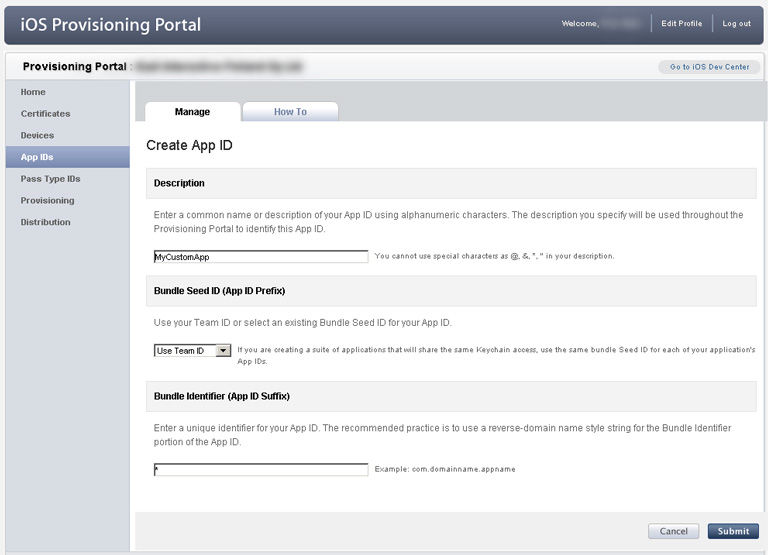
Go to https://developer.apple.com/ -> Member Center -> App IDs. Click on New App ID and fill the form. Add some description and type * (asterisk) for Bundle Identifier. There is no need to choose Bundle Seed ID.
Step 5: get a mobileprovision profile
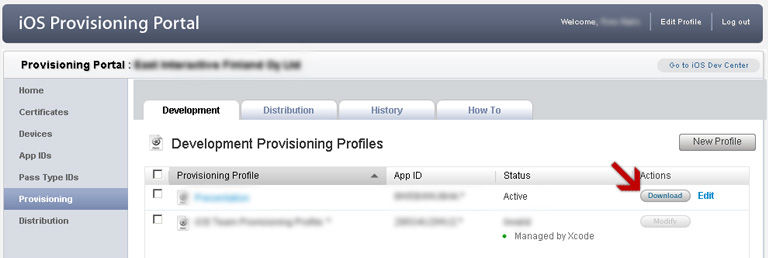
Go to https://developer.apple.com/ -> Member Center -> Provisioning. There is a button New Profile. Click it and fill the following form:
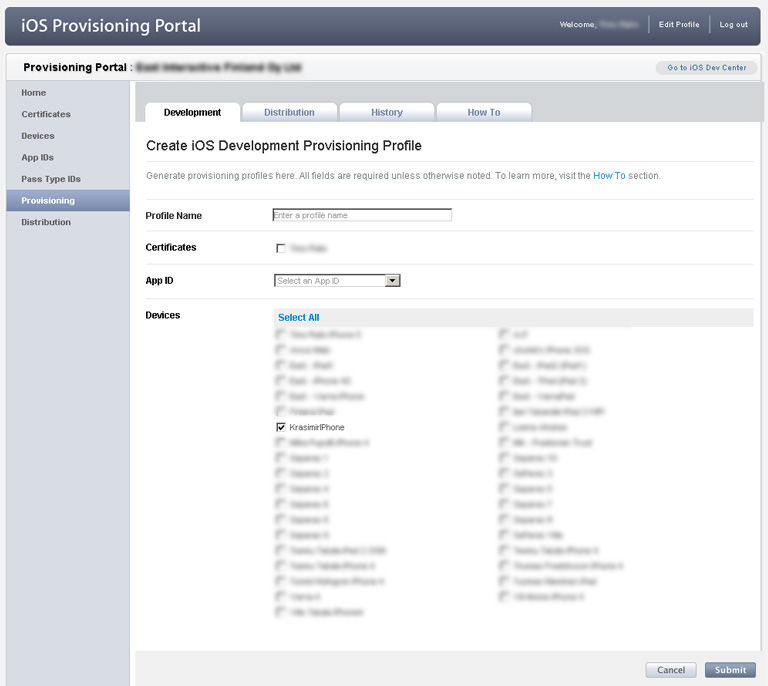
Of course, select the correct App ID and Devices. Once the form is submitted you will be able to download the .mobileprovision file.
Step 6: convert the Apple's certificate into a PEM certificate file
openssl x509 -in ios_development.cer -inform DER -out ios_development.pem -outform PEM
Step 7: generate a valid P12 file
openssl pkcs12 -export -inkey developer.key -in ios_development.pem -out developer.p12
You will be asked for a password. Type something and remember it. You will need it later.
Step 8: create application descriptor file
It's a simple xml file with the following structure:
<application xmlns="http://ns.adobe.com/air/application/2.7">
    <id>Application</id>
    <versionNumber>0.1</versionNumber>
    <filename>Application</filename>
    <initialWindow>
        <autoOrients>true</autoOrients>
        <aspectRatio>landscape</aspectRatio>
        <content>Your.swf</content>
        <visible>true</visible>
        <width>1280</width>
        <height>720</height>
        <fullScreen>true</fullScreen>
        <renderMode>gpu</renderMode>
    </initialWindow>
    <iPhone>
        <InfoAdditions>
            <![CDATA[
               <key>UIDeviceFamily</key>
               <array>
                   <string>2</string>
               </array>
           ]]>
        </InfoAdditions>
    </iPhone>
</application>
There are few interesting things. Pay attention to the tags in . I'm referring autoOrients and aspectRatio. These options will define the behaviour of your application regarding the device's orientation. The other very important thing is in iPhone tag. UIDeviceFamily should have 1 if you target your application for iPhone and 2 if you plan to install it on iPad. If you miss this your app will not scale correctly.
Step 8: Use AIR Developer Tool (ADT) to generate installable iOS application (.ipa file)
And at the end, you should collect everything in a single command and execute it:
adt -package -target ipa-debug -keystore developer.p12 -storetype pkcs12 -storepass password -provisioning-profile profile.mobileprovision app.ipa appdescriptor.xml yourswf.swf
Have in mind that you should replace password with your real password set in step 7.
Step 9: Installing the .ipa file
It's really simple - just double click on it. iTunes will run and you should be able to open your device's profile. There should be an Apps tab. Check you application and sync the device. If The installation fail check if you correctly choose the device in step 5.